Embed messages on Discord are messages that resemble a block embedded into the Discord user interface. Just like regular messages, they contain text, images, links, and files - but they look slightly different.

Let’s take a look at the image above. The one on the left is a regular Discord message, and the one on the right is an embed message - but have you noticed one little detail? The embed message isn’t sent by a regular user, it’s sent by an “APP.” Before circa May 17, 2024, you’d see “BOT” instead of “APP” (since Discord replaced the term “bot” with “app”) - but neither of those is totally accurate. The message is sent by a webhook.
Embed messages on Discord can be sent by bots, webhooks, and Discord’s system itself. A regular user can’t send embed messages natively within Discord. This is why it looks better when a server uses embed messages like rules, channel-info, etc., on their core channels.
Now, saying regular users can’t send embed messages is true, but there's a way around this. Using a webhook, which requires the Manage Webhook permissions on the server, everyone can send embed messages. You just need to use an external website.
Let’s take a look at how you can create a webhook URL on Discord and use it to send embed messages.
Sending Embed Messages on Discord
As we mentioned, regular users can send embed messages on Discord using webhook URLs. Webhook URLs are HTML callback functions. You can think of them as a message delivery system. People who have the Manage Webhooks permission on a Discord server can create webhook URLs per channel.
Creating a Webhook
Let’s get one thing out of the way first: webhook URLs are powerful. They are so powerful, in fact, that they’re not subject to your server’s AutoMod rules, any bot filters you create, and even most of Discord’s filters. If you share your webhook URL with someone with ill intentions, they can use it to spam your channel with scam links, bad words, unwanted images, and more. So do not share your webhook URL with ANYONE.
All right, now that you know sharing webhook URLs is dangerous, let’s see how you can create one.
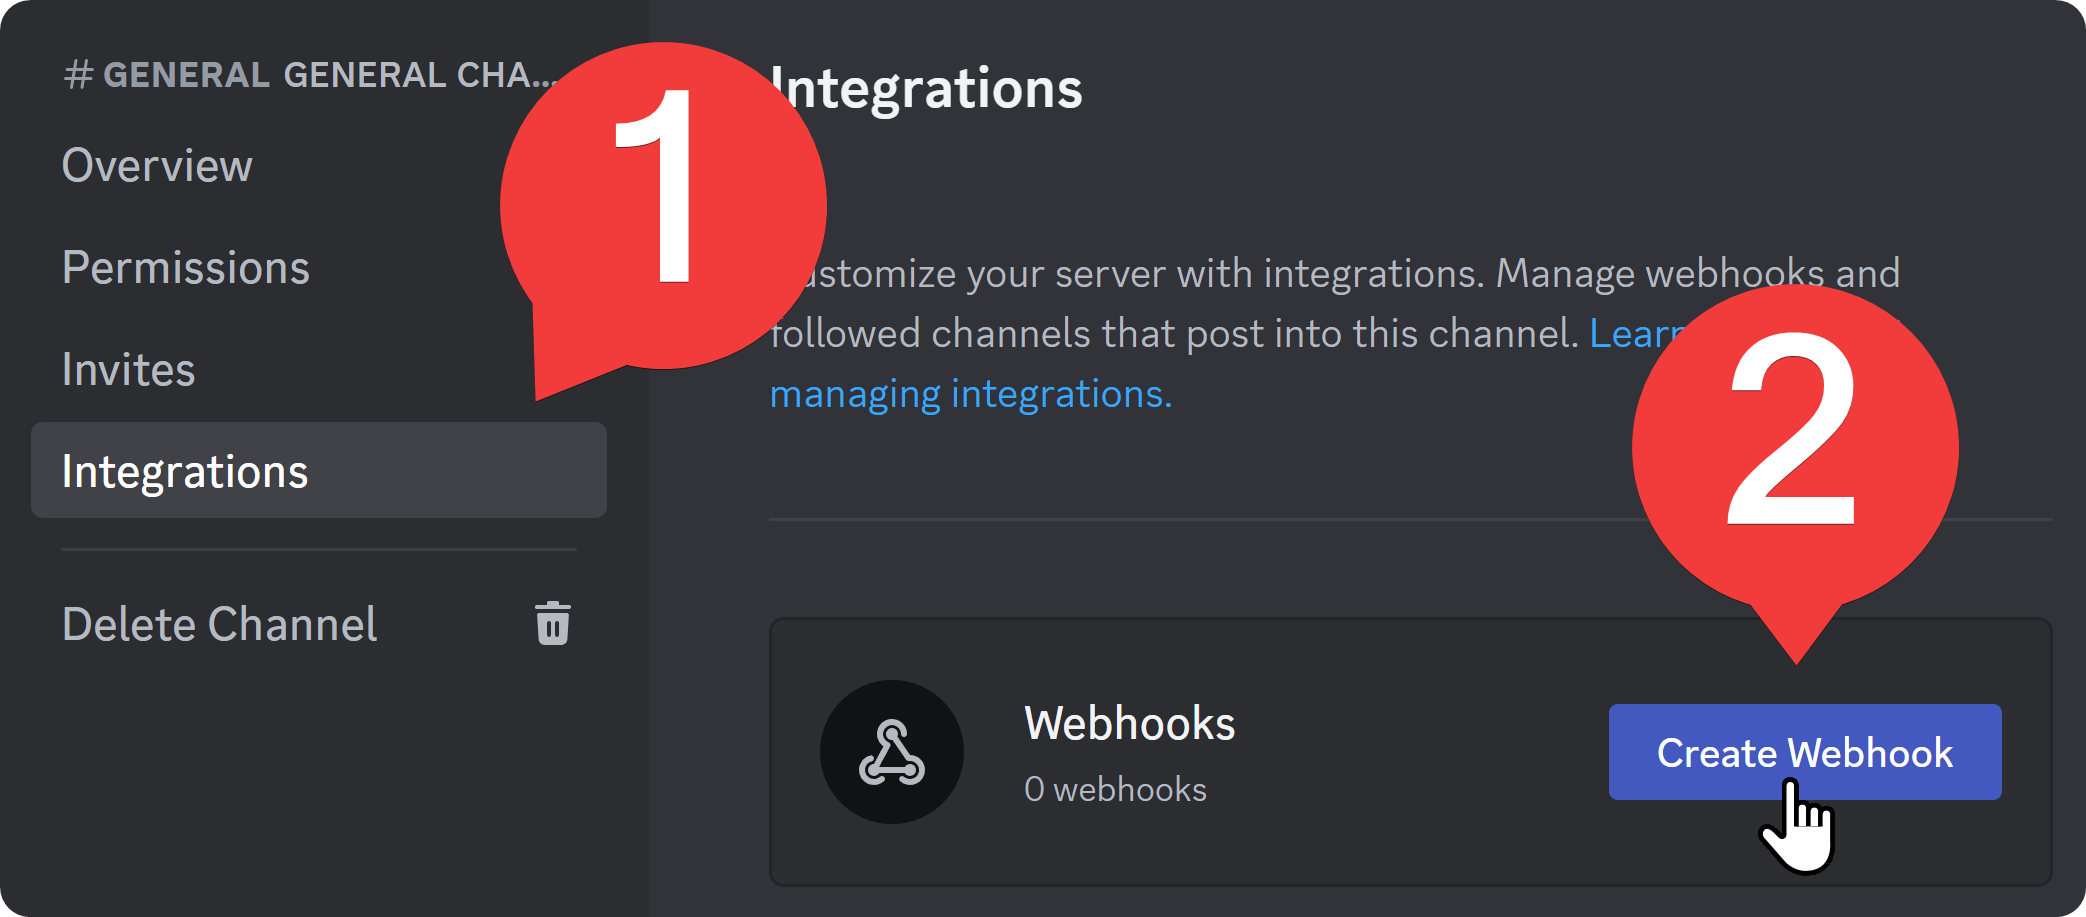
First, click on the Edit Channel button (cogwheel icon) of the channel you want to send an embed message to. This is going to take you to the settings of that particular channel.

Once you’re in the settings of the channel, you’re going to see four sections on the left side of your screen: Overview, Permissions, Invites, and Integrations.
Click on Integrations to see the Webhooks part. There, you can see a list of all the webhooks that the channel has. If you haven’t created any, it’s going to say “0 webhooks” under the “Webhooks” heading. Click on the Create Webhook button on the right side of your screen. This is going to create a new webhook - if it doesn’t immediately create one, just give it a second. If you spam the button, you might accidentally create too many webhooks.
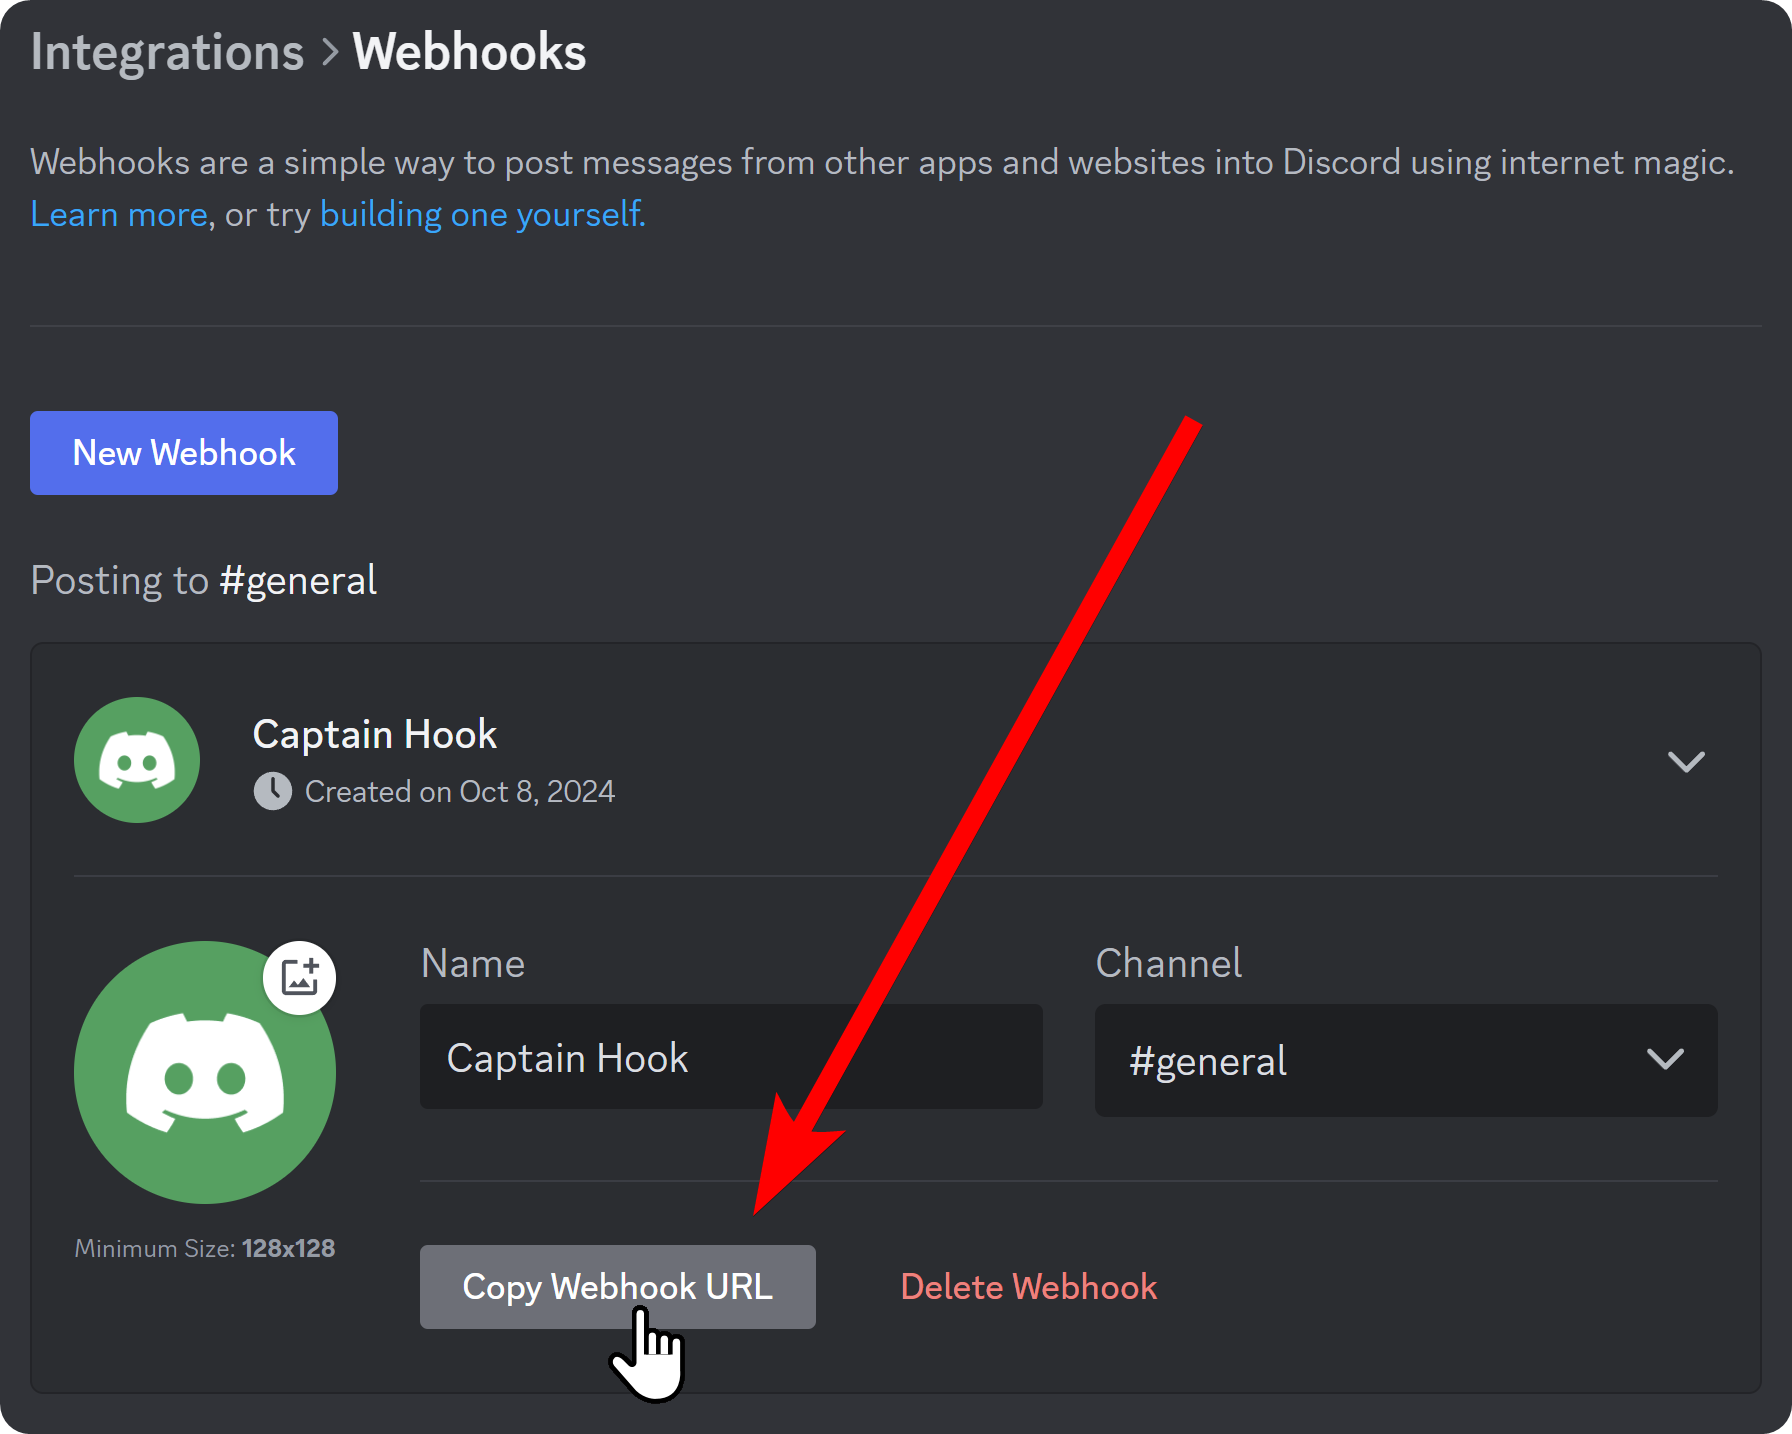
Once you create a webhook, you’re going to see a new section for it. In that section, you can click on the webhook’s profile icon to change its profile picture, edit its name, and its channel.
Below those fields, you’re going to see two buttons: Copy Webhook URL and Delete Webhook.
Clicking the Copy Webhook URL is going to copy its URL to your clipboard, and clicking the Delete Webhook button will display a confirmation message asking if you’re sure.
Let’s click on the Copy Webhook URL button and open up Discohook.
Using Discohook to Send Embed Messages
Now that you have a webhook URL for the channel you want to send the embed message to, let’s open up Discohook.
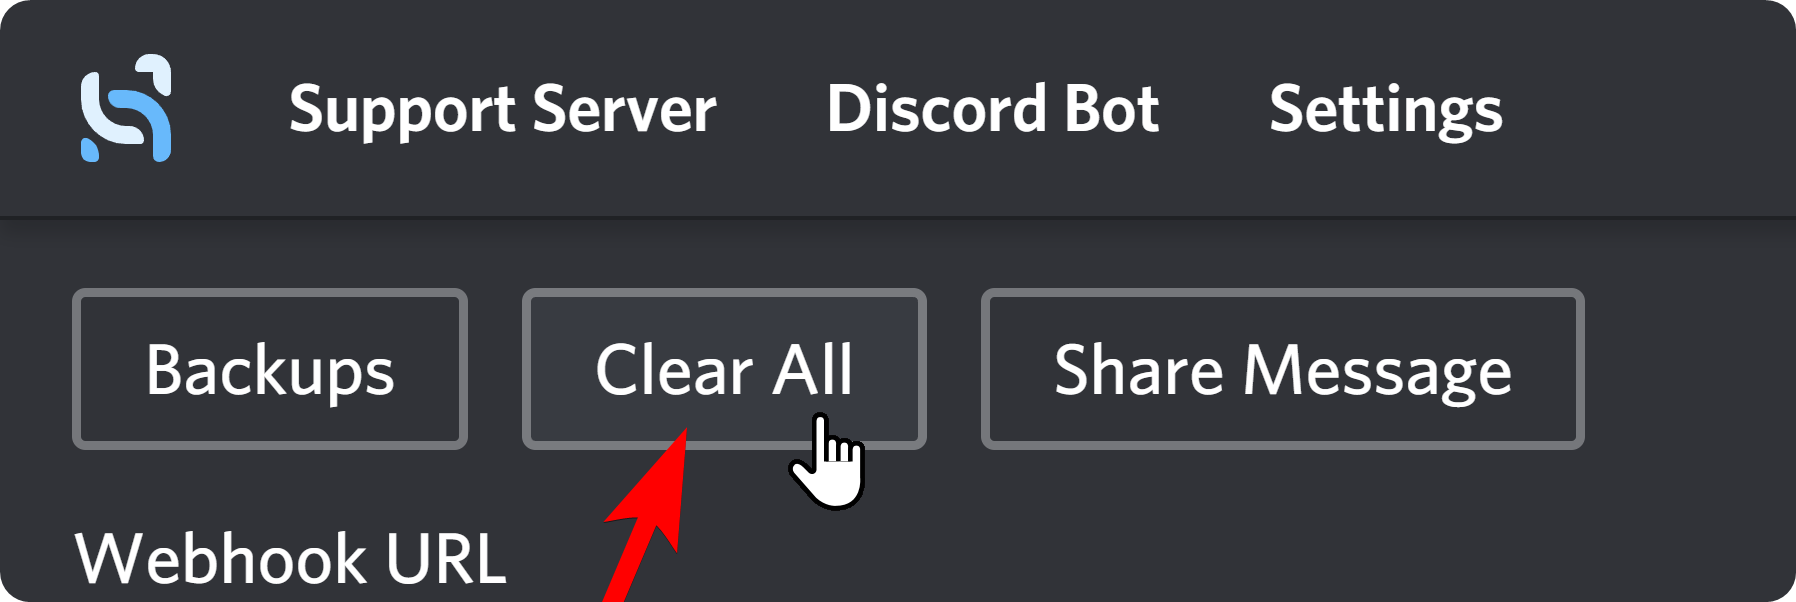
The first thing you want to do is to click on the Clear All button at the top left of your screen. This is going to get rid of the introductory example message Discohook has prepared for you.
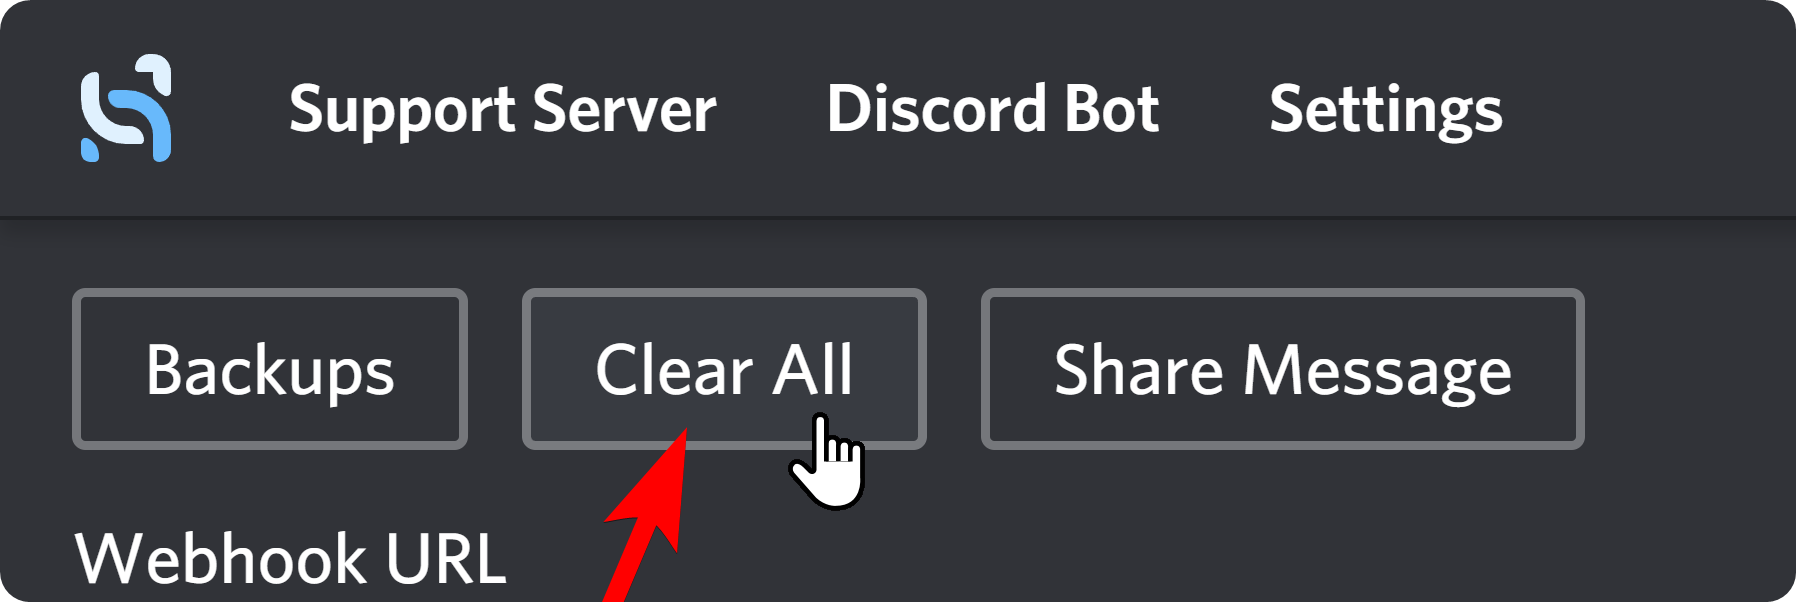
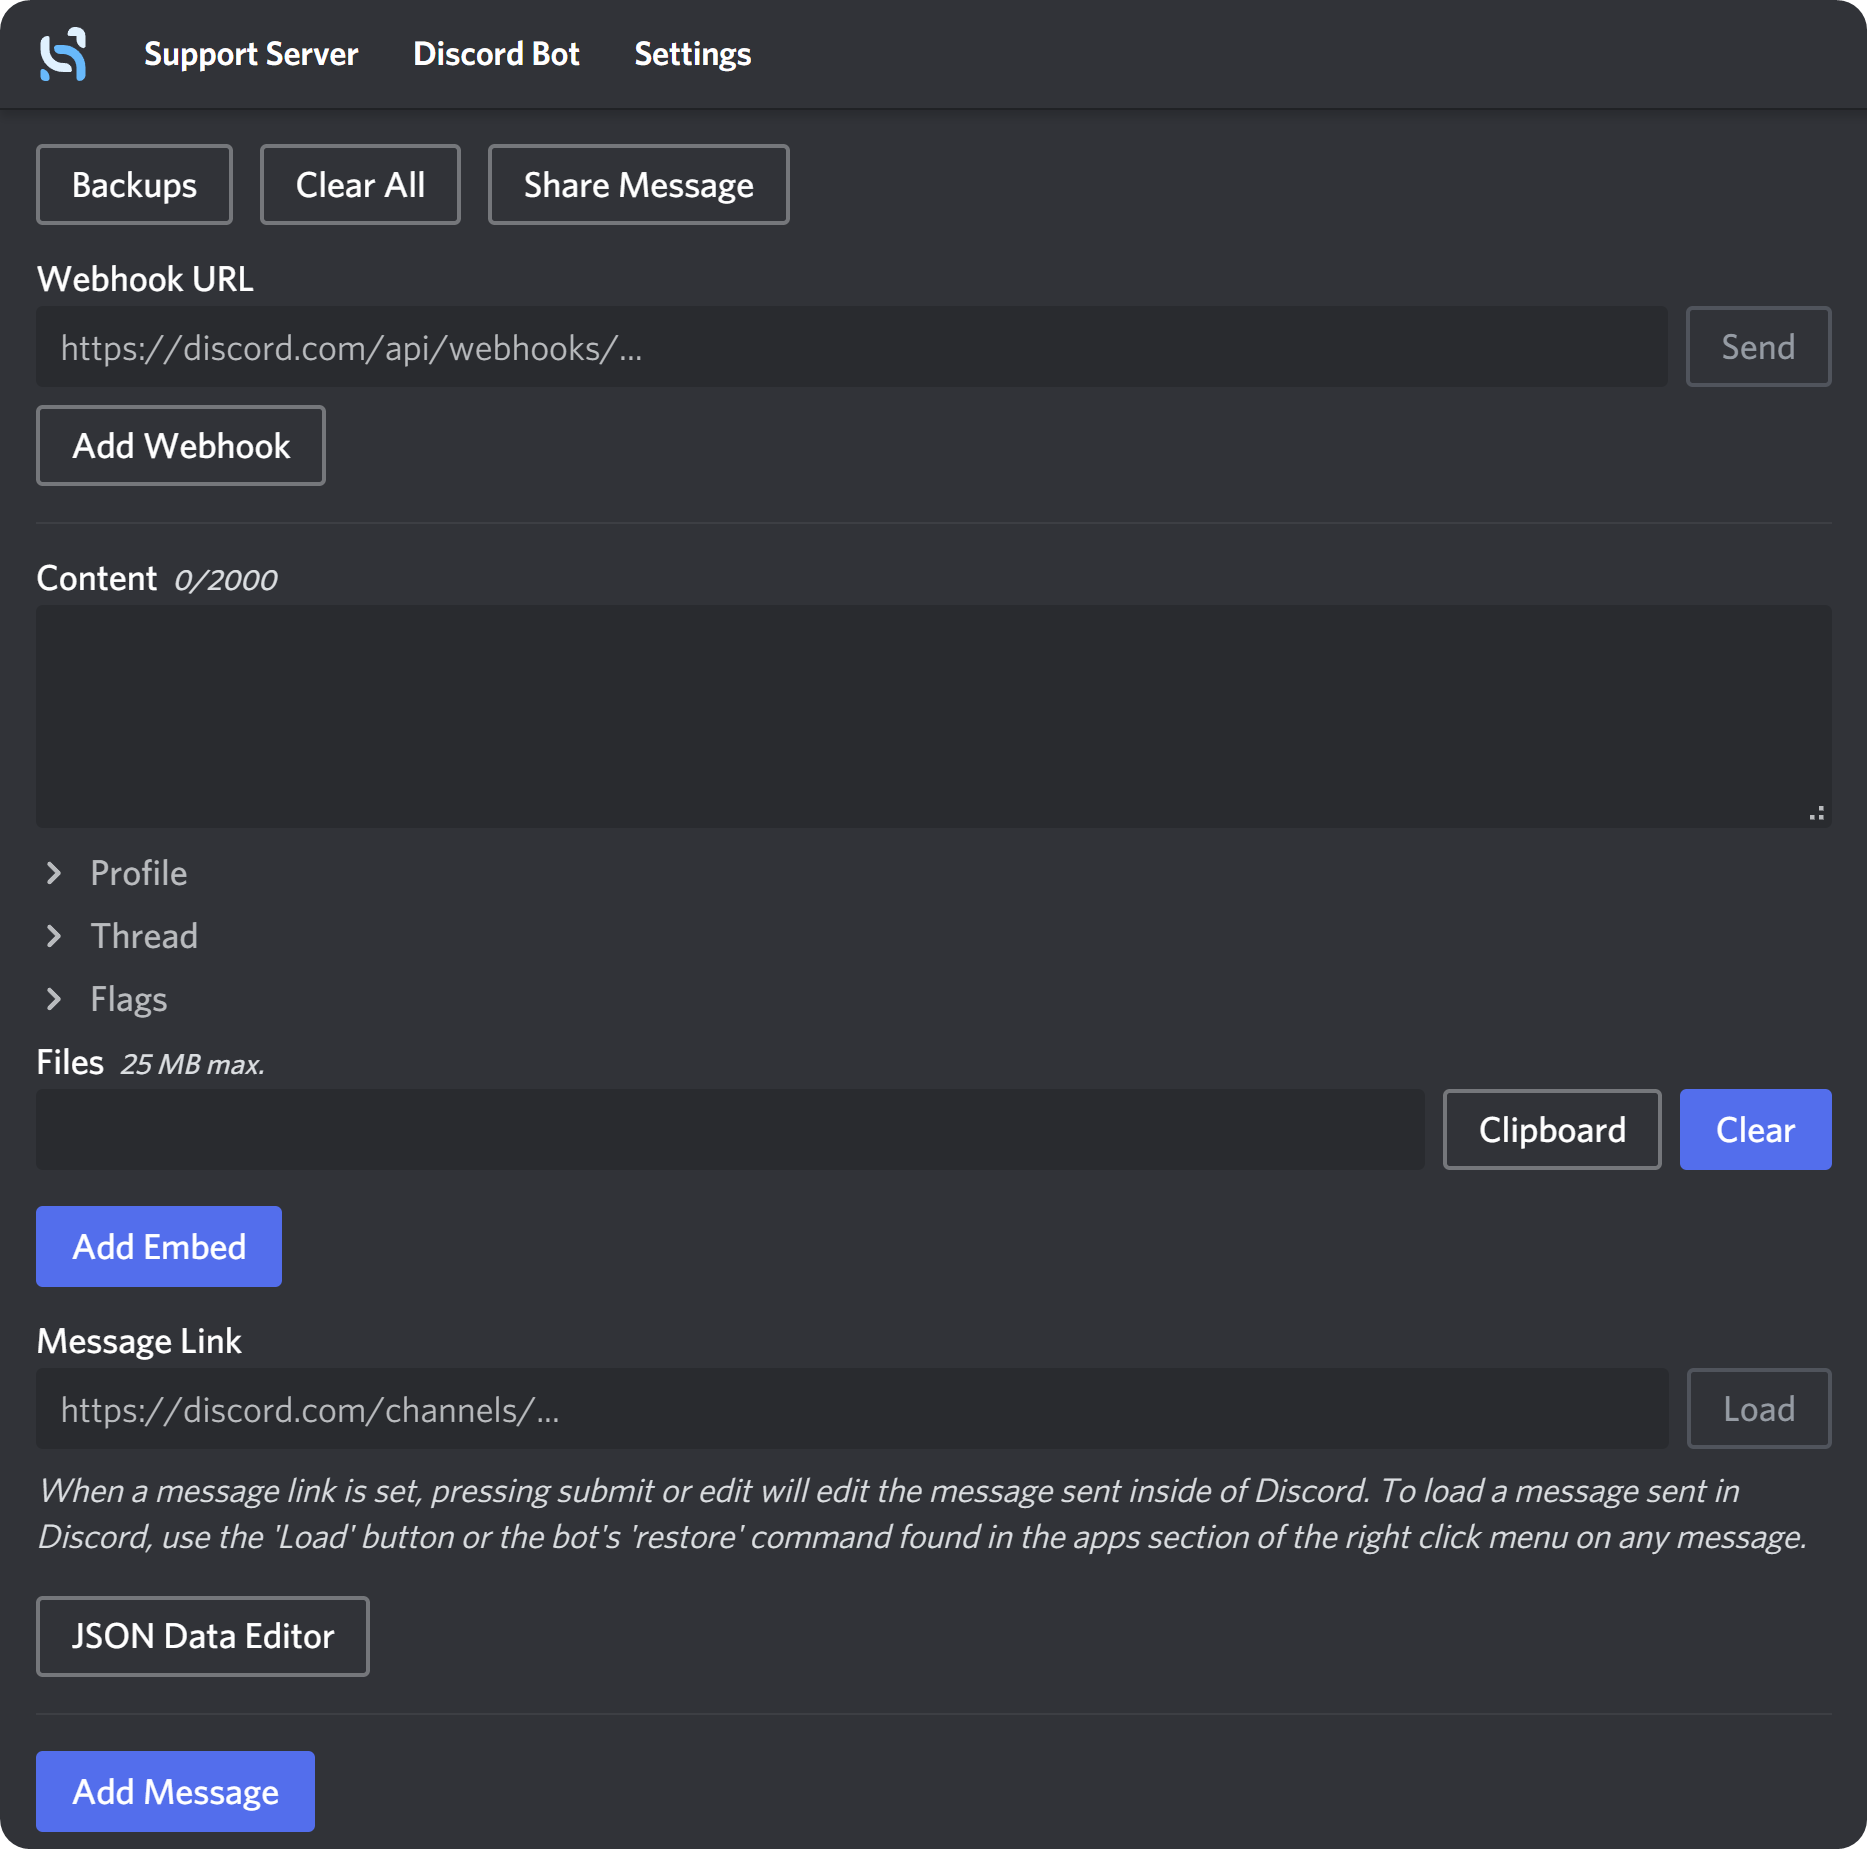
Once you click the Clear All button, your Discohook interface is going to look much cleaner.
Now, you see a bunch of fields on the left side of your screen and a preview of the message on the right side.
The preview might be empty for now, but it will be populated once you add content to the webhook message.
Let’s take a look at the sections Discohook has:
Backups, Clear All, and Share Message Buttons
These buttons, as their name suggests, allow you to access the backups of your webhook messages, clear all the fields below, and share the webhook message you’ve created.
Webhook URL Field, the Add Webhook Button, and the Send Button
The Webhook URL field is where you’re expected to paste the webhook URL you’ve copied on Discord.
The Add Webhook button allows you to add another webhook URL so you can send a message to two separate webhook URLs simultaneously.
The Send button, as its name suggests, will send the webhook message to the webhook URLs you’ve entered.
Once you’re done adjusting the fields you want, click the Send button to send the webhook message to the channel you’ve created the webhook in.

Content Field
The Content field is an input field with a 2000-character cap, and it’s the regular text field in your message. If you were to click the Send button after writing some text in this field, the webhook message would look like a regular, classic Discord message. You can always leave this section empty.

- Tip: Both embed and plain webhook messages support markdown formatting.
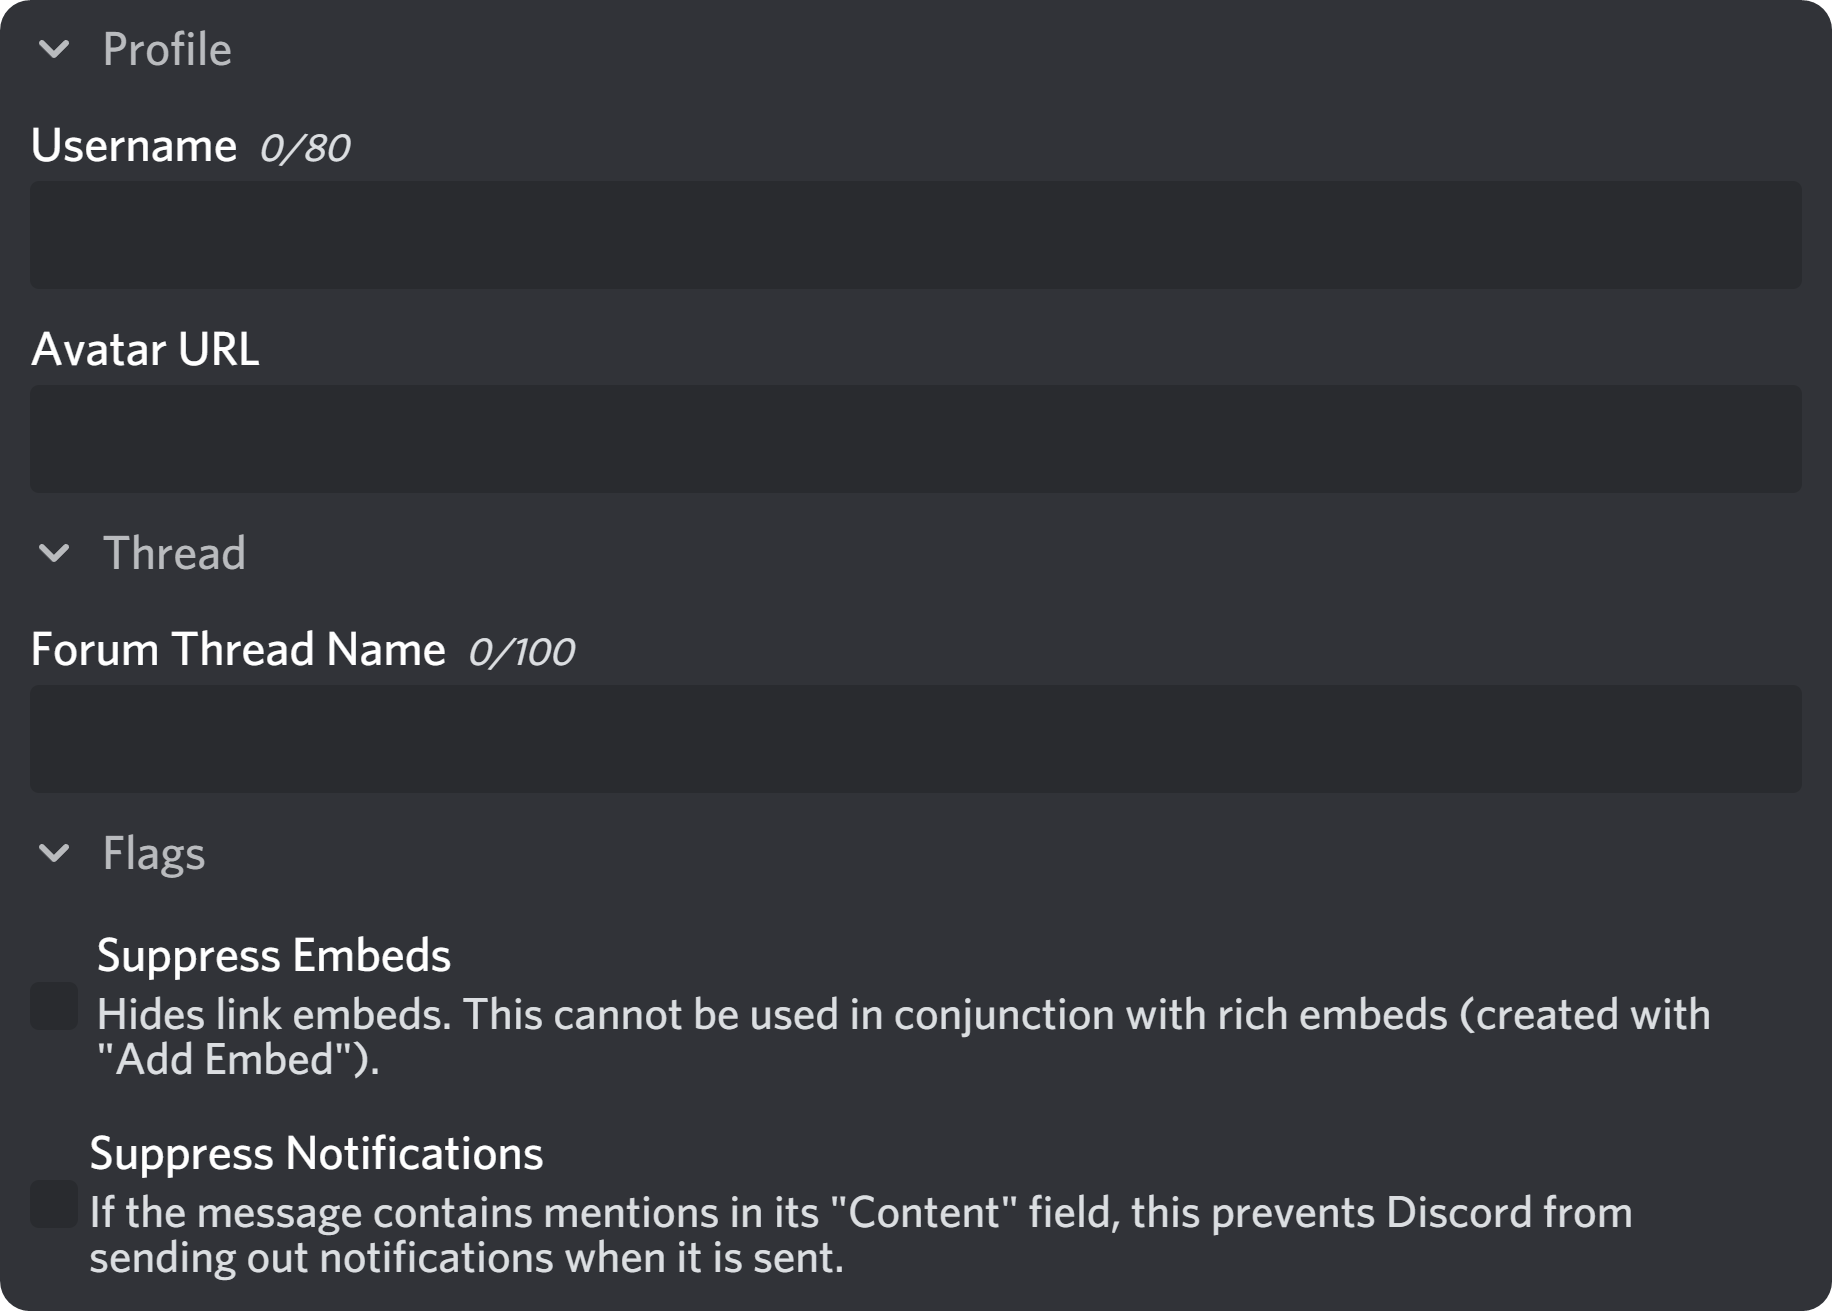
Profile, Thread, and Flags Sections
These three dropdown menus each have different settings.
The profile dropdown has fields for username and avatar URL, which will overwrite the webhook’s username and avatar.
The thread section is for webhook URLs that are created within Forum channels and it has a forum thread name field that determines the name of the post that the webhook message will create. The flags menu has two options: suppress embeds and suppress notifications. They will disable the link embeds and prevent the message from sending notifications to tagged users, respectively.
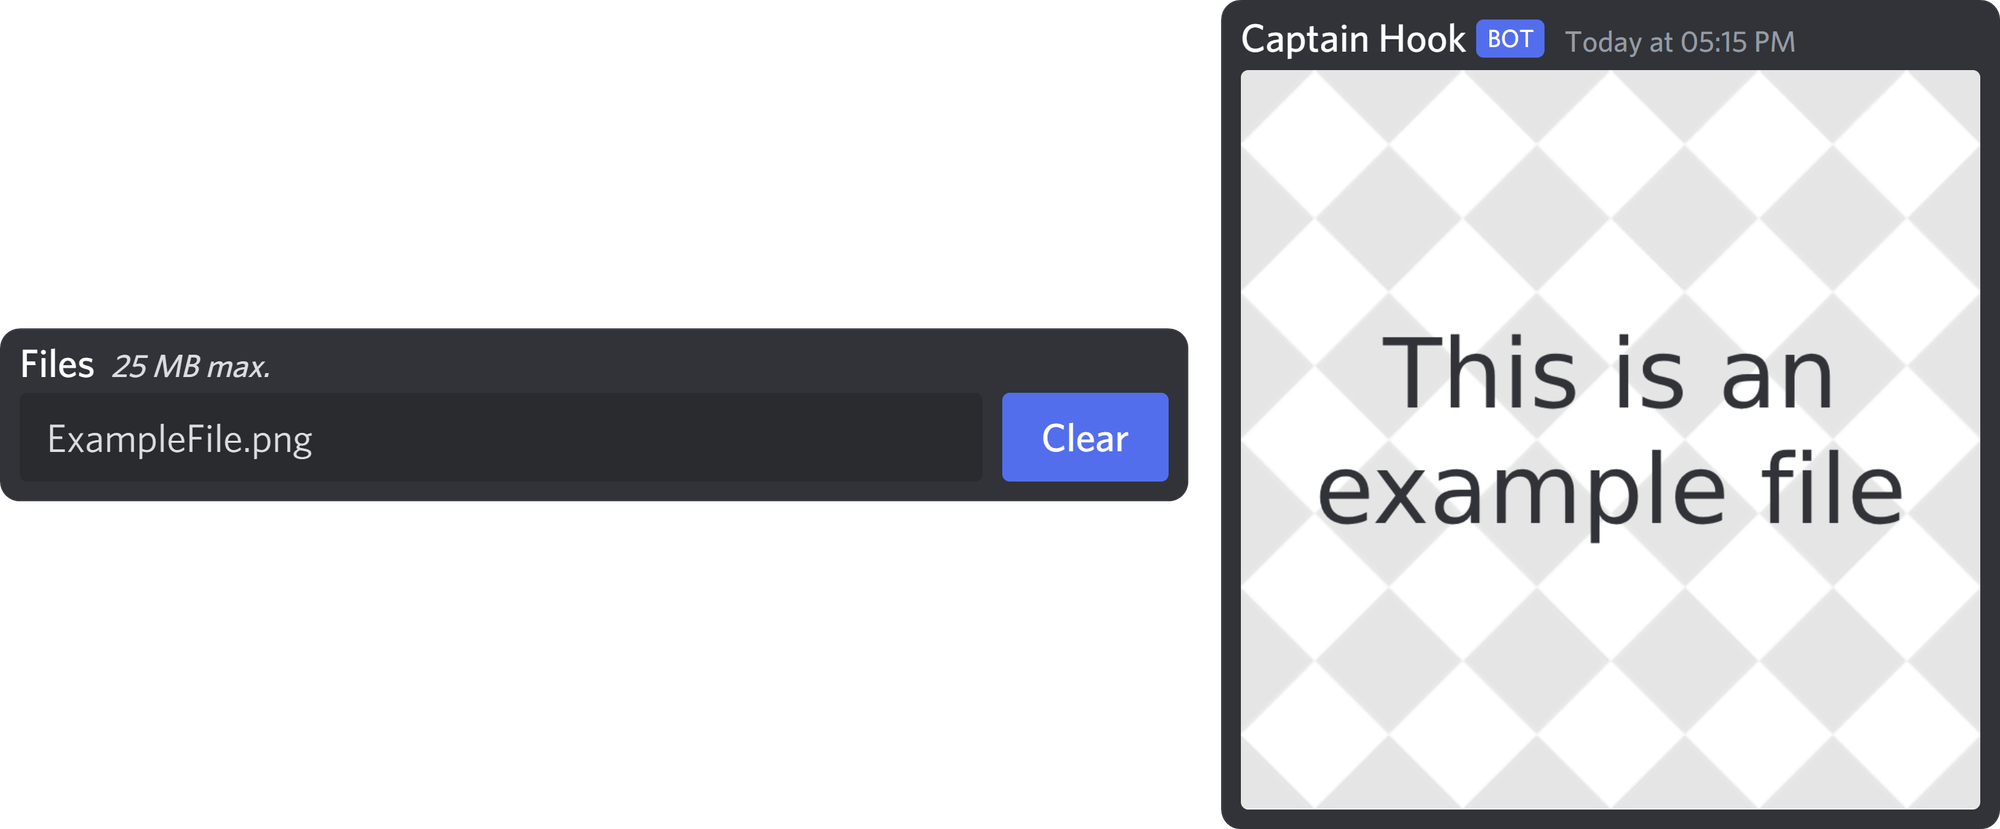
Files Field
The files field allows you to upload files to your message and they look like exactly as how it would look if you attached a file to a regular message.
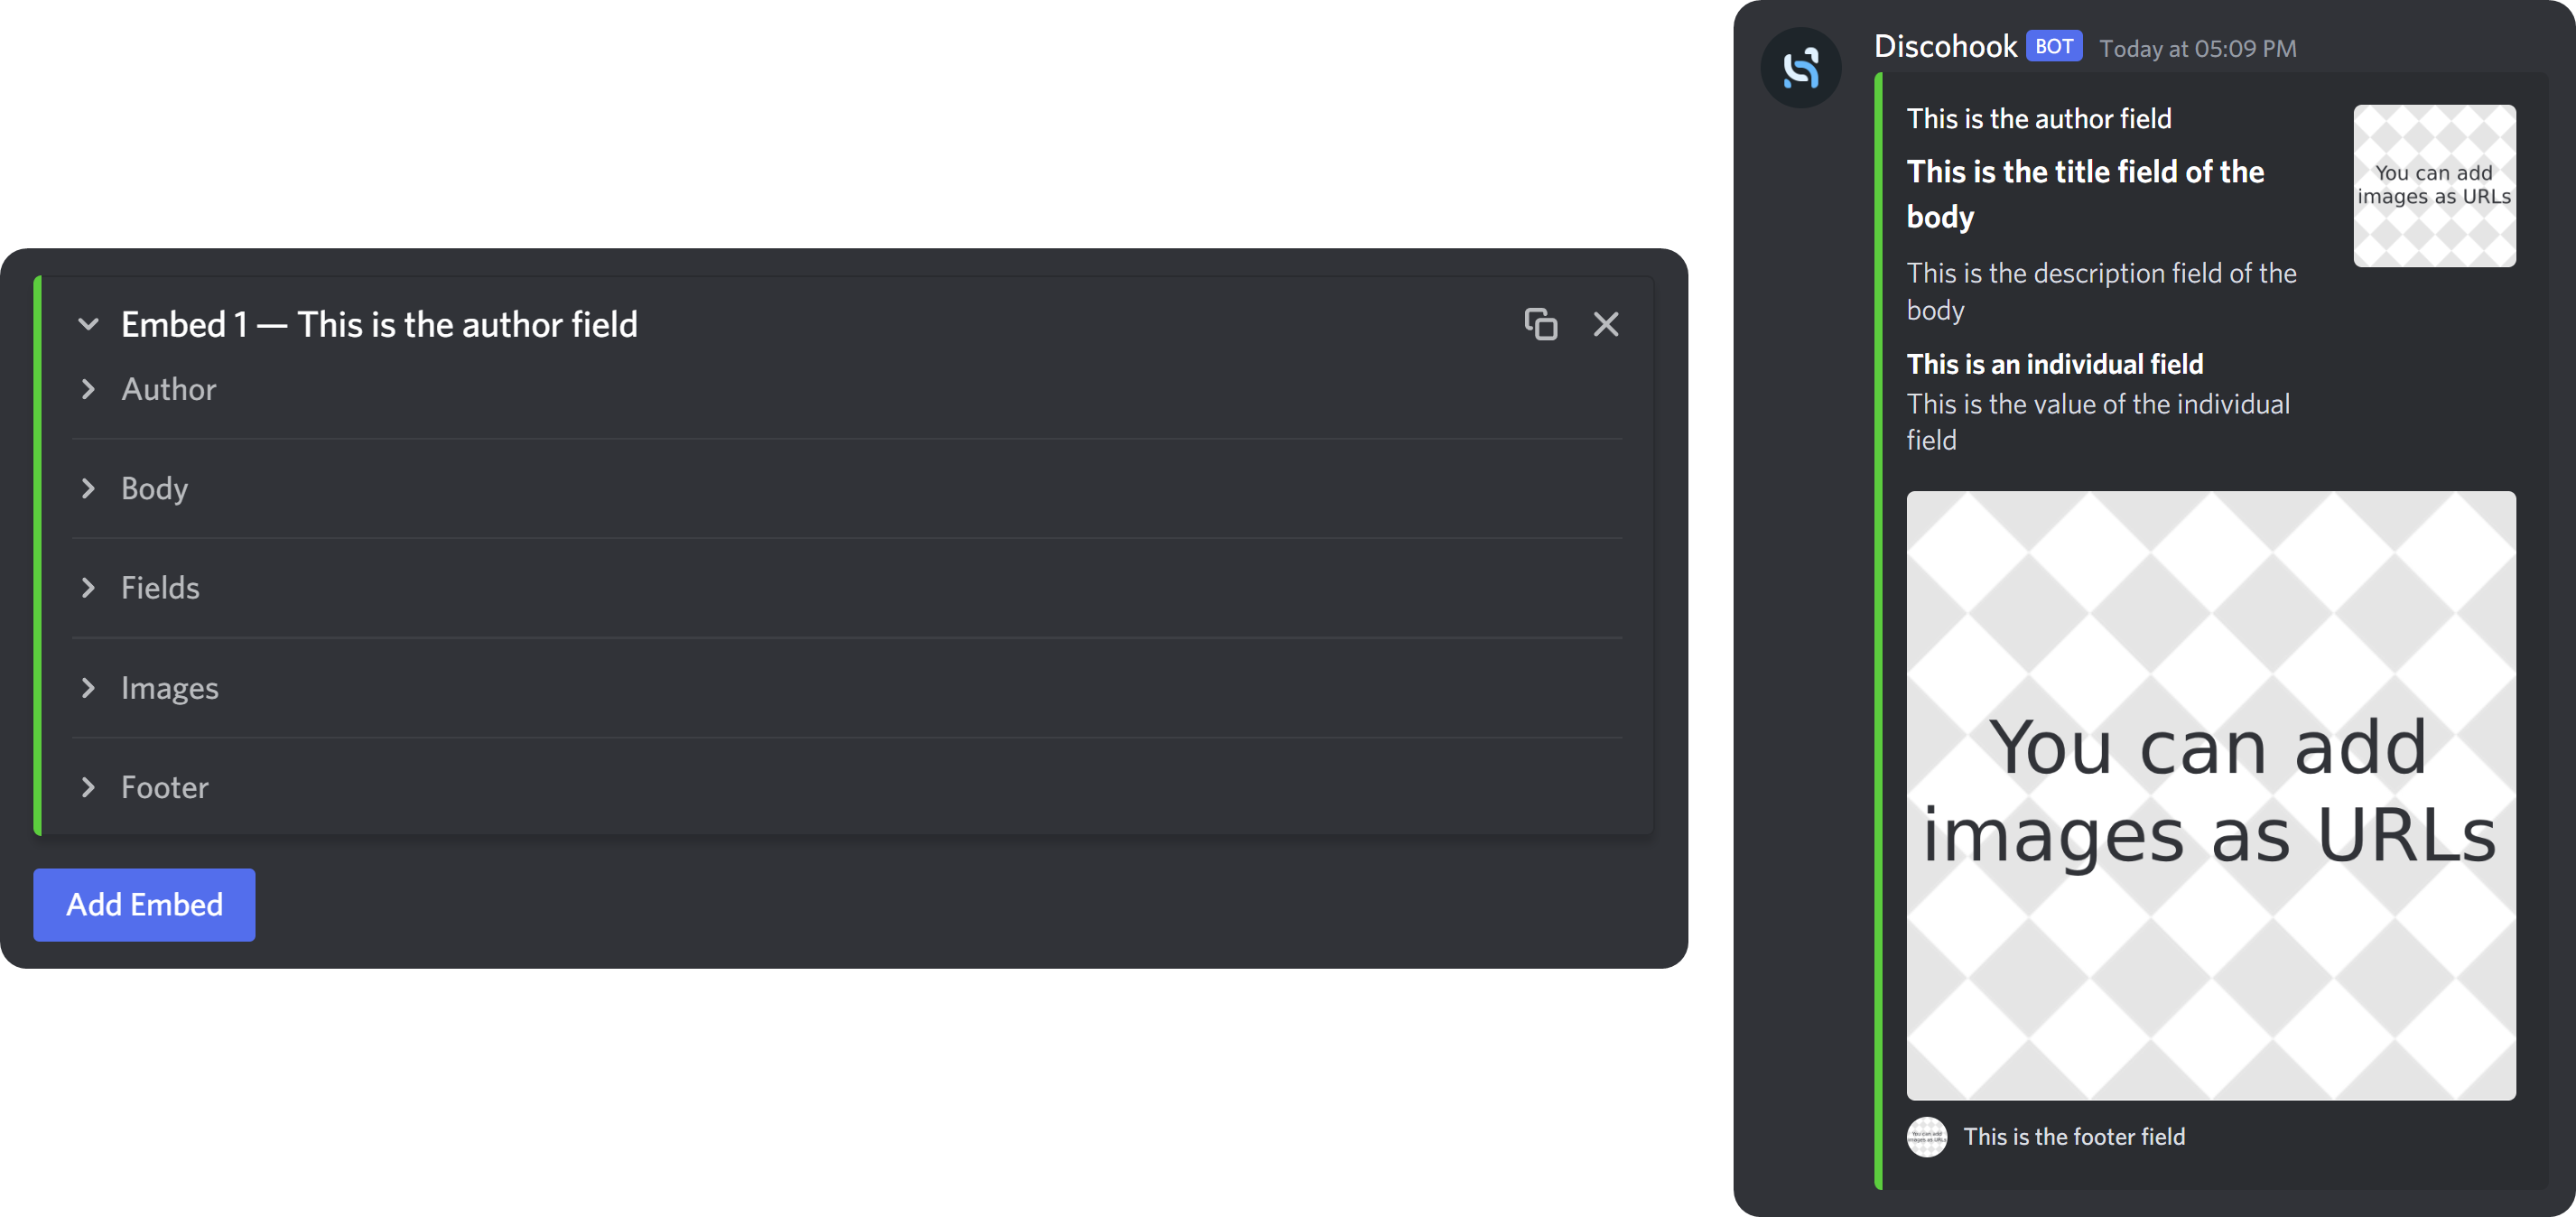
Add Embed Button and Embed Fields
Clicking the Add Embed button allows you to attach an embed to your webhook message. Once you click the Add Embed button, it will display a dropdown called “Embed 1” with five fields: Author, Body, Fields, Images, and Footer. Each field allows you to alter an individual section of the embed.
Message Link and JSON Data Editor Button
The message link field can be used for two things.
The first one is pasting the link of a previous message (it doesn’t have to be a webhook message) to copy its contents to the Discohook fields. Keep in mind that to do this, you have to paste the webhook URL of the channel to which the message in question is sent.
The second thing you can do is paste a webhook message and its webhook URL to edit that specific message.

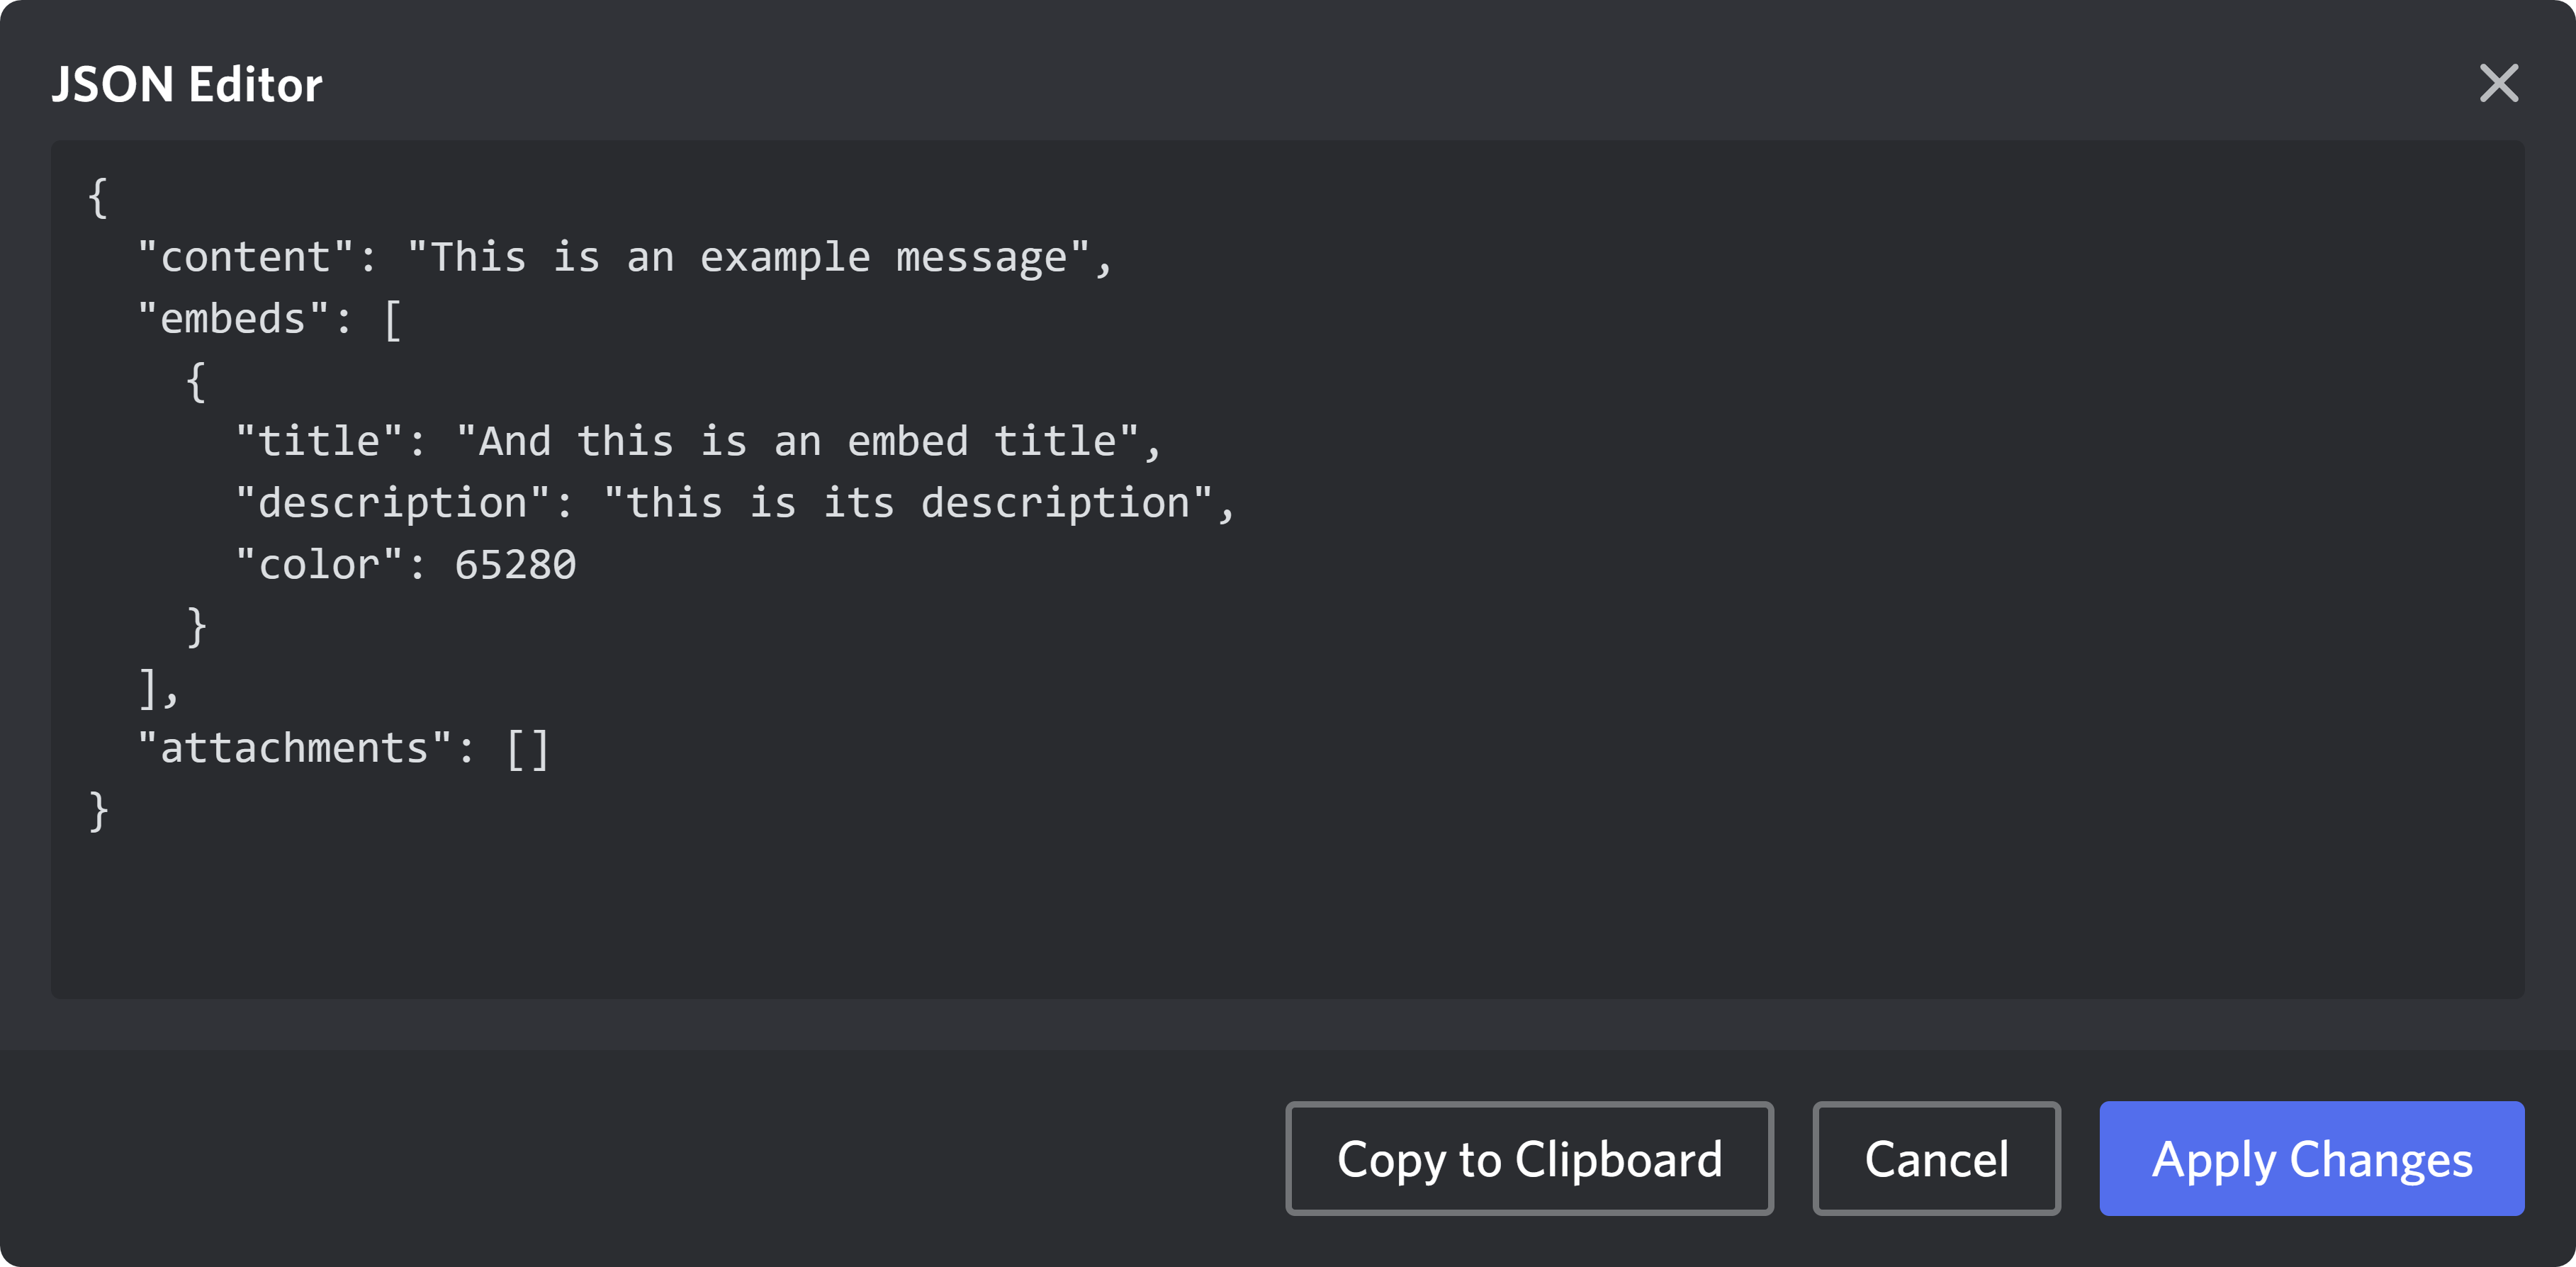
Clicking the JSON Data Editor button is going to display a new window with the JSON code of the message in it. This is useful if you want to share the message you’ve designed with others who don’t use a third-party service like Discohook. If they do use Discohook, it would be better to use the Share Message button at the top of the page.
Add Message Button
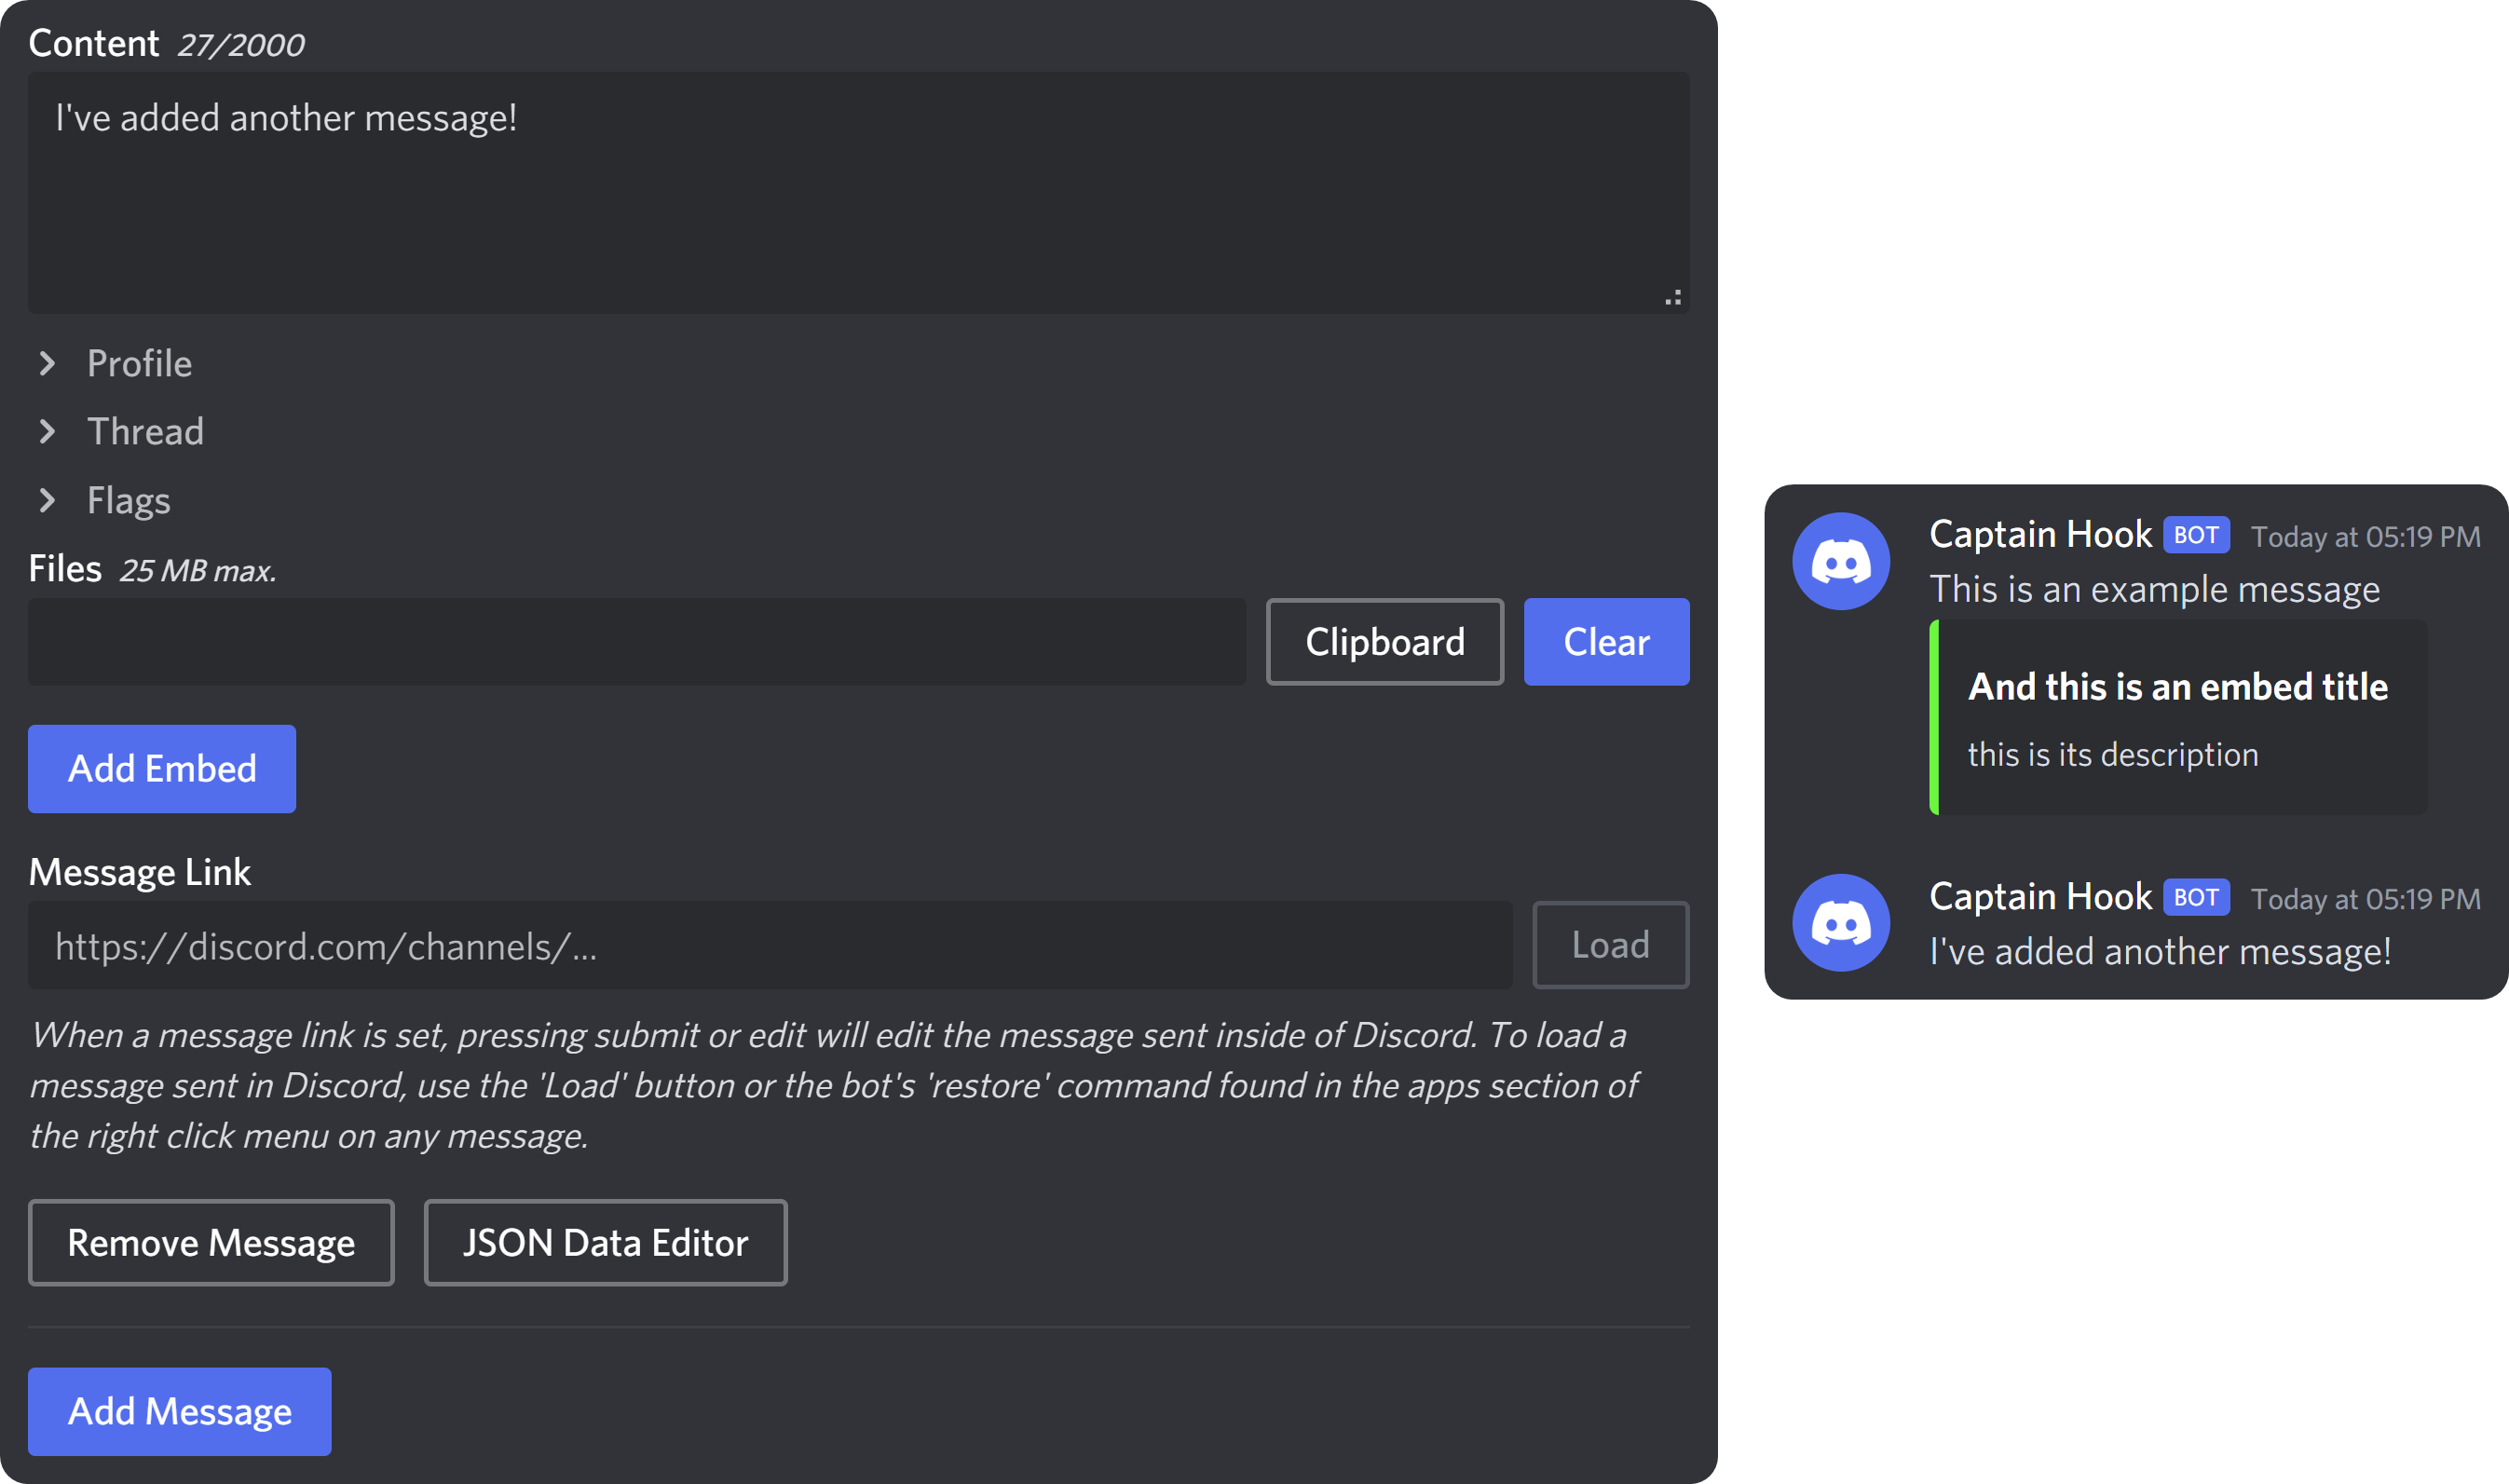
Clicking the Add Message button at the bottom of the page is going to allow you to add another message to the webhook message you’re sending. This is useful in cases where you want to send a long text that is likely to exceed the character limit of a single message. After adding another message, you’re going to get another set of fields that we’ve been talking about so far.
Grow Your Discord Server with Whop
Now that you know how you can use embed messages, you have an advantage over other servers - you can make your look more interesting and professional. The next step is transforming your server into a premium one. You can do this by joining Whop.
Whop is home to thousands of premium Discord servers, and you can become one of them and start monetizing your server. Signing up and starting to sell access to your server takes less than 10 minutes - sign up today.





![Discord Message Forwarding: The Newest Discord Feature Explained [October 2024]](/blog/content/images/size/w600/2024/07/Discord-Message-Forwarding.webp)